Nikon D5000 Manual: A Comprehensive Guide
This guide offers detailed instructions, troubleshooting, and advanced techniques for maximizing your Nikon D5000’s potential, ensuring optimal photographic results.
Welcome to the world of DSLR photography with the Nikon D5000! This user-friendly camera bridges the gap between point-and-shoot convenience and the creative control of more advanced systems. Designed for both beginners and enthusiasts, the D5000 boasts a 12.3-megapixel CCD sensor, delivering high-resolution images with excellent clarity and detail.
Its intuitive interface and helpful Guide Mode make learning the fundamentals of photography a breeze. This manual will serve as your companion, unlocking the full potential of your D5000. We’ll explore everything from basic operations to advanced features, empowering you to capture stunning photos and videos. Prepare to embark on a photographic journey!
Understanding the Camera Body & Controls
The Nikon D5000’s body is ergonomically designed for comfortable handling during extended shooting sessions. Key controls are strategically placed for easy access. The Mode Dial, located on top, selects shooting modes like Auto, Program, Aperture-Priority, Shutter-Priority, and Manual. The shutter button initiates image capture, while the control dial adjusts settings.
The rear panel features a 2.7-inch LCD screen for composing shots and reviewing images. Surrounding the screen are buttons for menu navigation, image playback, and accessing quick settings. The four-way controller allows for efficient menu exploration. Familiarizing yourself with these controls is crucial for seamless operation and unlocking the camera’s full capabilities.
Key Features of the Nikon D5000
The Nikon D5000 boasts a 12.3-megapixel DX-format CMOS sensor, delivering high-resolution images with excellent detail and clarity. Its DIGIC 3 image processor ensures fast processing speeds and reduced noise. The camera features 11-point autofocus system for accurate subject tracking, and offers continuous shooting at up to 3.5 frames per second.
A standout feature is the 2.7-inch articulating LCD screen, enabling comfortable shooting from various angles. It also includes in-camera editing tools for basic image adjustments. The D5000 supports SD/SDHC memory cards and offers a range of creative Picture Control settings to customize image appearance. These features combine to provide a versatile and capable DSLR experience.
Getting Started: Basic Operations
Begin your photographic journey by learning essential steps: battery insertion, memory card installation, powering the camera on/off, and navigating the intuitive menu system.
Inserting the Battery and Memory Card
Properly preparing your Nikon D5000 begins with correctly installing the battery and a compatible memory card. Locate the battery compartment door, typically on the bottom of the camera, and release the latch. Insert the EN-EL9a battery, ensuring the contacts align, and firmly press it into place until it clicks.
Next, find the memory card slot, usually alongside the battery compartment. The D5000 supports SD and SDHC cards. Gently insert the card, label-side up, until it locks into position. Avoid forcing the card; if it doesn’t slide in easily, check the orientation. Always power off the camera before inserting or removing either the battery or memory card to prevent data corruption or damage to the camera.
Powering On/Off and Initial Setup
To power on your Nikon D5000, locate the main power switch, usually surrounding the shutter button. Move the switch to the “ON” position. The camera will initialize, and the LCD screen will illuminate. During initial setup, you’ll be prompted to select your language, date, and time. Use the multi-selector and OK button to navigate and confirm your choices.
The camera will also ask you to set the area for date/time display. After these basic settings, the camera will guide you through setting the image quality and shooting mode. Take your time to familiarize yourself with these options. To power off, return the main power switch to the “OFF” position. Remember to always use the switch, not just letting the camera sleep, for complete shutdown.
Navigating the Menu System
The Nikon D5000’s menu system is accessed by pressing the “Menu” button on the rear of the camera. The menu is divided into several tabs, represented by icons: Playback, Shooting, Custom Settings, and Setup. Use the multi-selector (directional buttons) to navigate between tabs and menu options. Press “OK” to select an option or enter a submenu.
To exit a menu or submenu, press the “Menu” button again. The “Setup” menu allows you to customize general camera settings like display brightness, sound volume, and date/time format. The “Custom Settings” menu offers advanced options for fine-tuning camera behavior. Familiarize yourself with the menu structure to efficiently adjust settings for your shooting needs.
Shooting Modes Explained
Explore diverse shooting modes, from fully automatic simplicity to complete manual control, unlocking creative potential and tailoring settings to various photographic scenarios.
Auto Mode: Point-and-Shoot Simplicity
Auto mode on the Nikon D5000 is designed for effortless photography, ideal for beginners or quick snapshots. The camera automatically selects the optimal settings – aperture, shutter speed, ISO, and white balance – based on the scene. This eliminates the need for manual adjustments, allowing you to simply point and shoot.

While convenient, Auto mode offers limited creative control. The camera prioritizes ease of use over customization. However, it’s a fantastic starting point for learning composition and framing. To activate Auto mode, simply set the mode dial to the green “Auto” setting. The camera’s scene recognition technology intelligently analyzes the subject, choosing the most appropriate settings for portraits, landscapes, or close-ups. Remember to review your images to understand how the camera interprets different scenes.
Program Auto (P) Mode: Semi-Automatic Control
Program Auto (P) mode on the Nikon D5000 strikes a balance between convenience and control. The camera automatically sets both aperture and shutter speed, but allows you to adjust other settings like ISO, white balance, and exposure compensation. This offers more creative flexibility than full Auto mode, while still simplifying the technical aspects of photography.
In P mode, you can “shift” the program – altering both aperture and shutter speed simultaneously to achieve a desired effect. This is useful for controlling depth of field or motion blur without directly setting individual values. Access the program shift by turning the main command dial after pressing the ‘P’ button. It’s a great stepping stone towards mastering aperture-priority or shutter-priority modes, providing a gentle introduction to manual control.
Aperture-Priority (A) Mode: Controlling Depth of Field
Aperture-Priority (A) mode on your Nikon D5000 empowers you to dictate the depth of field in your images. You select the aperture (f-stop), and the camera automatically chooses the appropriate shutter speed for correct exposure. A wider aperture (lower f-number, like f/2.8) creates a shallow depth of field, blurring the background – ideal for portraits. Conversely, a narrower aperture (higher f-number, like f/16) yields a greater depth of field, keeping more of the scene in focus, perfect for landscapes.
Understanding the relationship between aperture and depth of field is crucial for creative control. Experiment with different f-stops to see how they impact your images. Remember to monitor the shutter speed; if it becomes too slow, consider increasing ISO to avoid motion blur.
Shutter-Priority (S) Mode: Capturing Motion
Shutter-Priority (S) mode on the Nikon D5000 allows you to control the duration of the camera’s shutter, directly influencing how motion is captured. A fast shutter speed (e.g., 1/1000s) freezes action, perfect for sports or wildlife photography. A slower shutter speed (e.g., 1/30s) intentionally blurs motion, conveying a sense of speed or movement – ideal for waterfalls or light trails.
The camera automatically adjusts the aperture to achieve proper exposure. Be mindful of the resulting aperture; a narrow aperture might require a higher ISO to maintain a reasonable shutter speed. Utilize a tripod for slow shutter speeds to prevent camera shake and ensure sharp results. Experiment to master motion control!
Manual (M) Mode: Full Creative Control
Manual (M) mode grants complete control over both aperture and shutter speed on your Nikon D5000, empowering truly creative photography. This mode requires understanding the exposure triangle – the relationship between aperture, shutter speed, and ISO. Adjust aperture for depth of field, shutter speed to control motion blur, and ISO to manage sensitivity to light.
Use the camera’s light meter as a guide, but don’t be afraid to deviate for artistic effect. Manual mode is excellent for challenging lighting situations where automatic modes struggle. Practice is key to mastering this mode; start by observing how aperture and shutter speed impact your images and refine your technique.

Focusing and Exposure
Mastering focus and exposure settings is crucial for sharp, well-lit images with your Nikon D5000, unlocking its full photographic potential.
Autofocus Modes: Single, Continuous, and Dynamic Area
The Nikon D5000 offers several autofocus (AF) modes to suit various shooting scenarios. Single-area AF (AF-S) is ideal for stationary subjects; the camera focuses once when you half-press the shutter button. Continuous-area AF (AF-C) tracks moving subjects, continuously adjusting focus as they move – perfect for sports or wildlife.
Dynamic-area AF combines both, allowing you to select a focus point and the camera will track the subject if it moves away from that point. The number of focus points used in dynamic-area AF can be customized. Understanding when to use each mode is key to capturing sharp images. Experiment with these settings to find what works best for your specific photographic needs and subject matter. Proper AF mode selection dramatically improves image quality.
Focus Points and Selection
The Nikon D5000 features 11 autofocus (AF) points strategically positioned across the frame. You can select a single AF point for precise focusing, or allow the camera to automatically select one using auto-area AF. To manually select a focus point, use the directional pad on the camera’s back. The selected point will be highlighted in the viewfinder.
Understanding how to choose the right focus point is crucial for sharp images. For portraits, focus on the subject’s eye. For landscapes, consider focusing one-third of the way into the scene. Experiment with different points to achieve the desired depth of field. Mastering focus point selection gives you greater control over your images and ensures your intended subject is tack-sharp.
Exposure Compensation: Brightening or Darkening Images
Exposure compensation allows you to override the camera’s automatic exposure settings, brightening or darkening images as needed. This is particularly useful in challenging lighting situations where the camera might be fooled, such as scenes with bright snow or dark subjects. The D5000’s exposure compensation scale is measured in stops (+/- 5 EV).
To adjust exposure compensation, press the +/- button on the top panel while in Aperture-Priority (A) or Shutter-Priority (S) mode. Use the main command dial to select the desired compensation value. Positive values brighten the image, while negative values darken it. Regularly reviewing your images’ histograms will help you refine your exposure compensation skills and achieve consistently well-exposed photographs.
Metering Modes: Evaluative, Center-Weighted, and Spot
The Nikon D5000 offers three distinct metering modes to analyze light and determine optimal exposure settings. Evaluative metering (the default) assesses the entire scene, prioritizing the area around the focus point. Center-weighted metering places greater emphasis on the center of the frame, useful for portraits or subjects centrally located.
Spot metering measures light from a very small area, ideal for challenging lighting or when precise exposure of a specific subject is crucial. To change metering modes, access the camera’s shooting menu. Understanding each mode’s strengths allows you to tailor exposure to various photographic scenarios, ensuring accurate and consistent results. Experimentation is key to mastering these settings.
Understanding ISO Sensitivity
ISO sensitivity on the Nikon D5000 controls the camera’s sensitivity to light. Lower ISO settings (like 100 or 200) produce cleaner images with minimal noise, ideal for bright conditions. Higher ISO settings (like 800, 1600, or 3200) allow shooting in low light, but introduce more digital noise or grain.
Auto ISO is a convenient option, letting the camera select the appropriate ISO based on shooting conditions. However, manually controlling ISO provides greater creative control. Be mindful of the trade-off between brightness and image quality when increasing ISO. Experiment to find the highest usable ISO setting for your specific needs and desired image aesthetic.
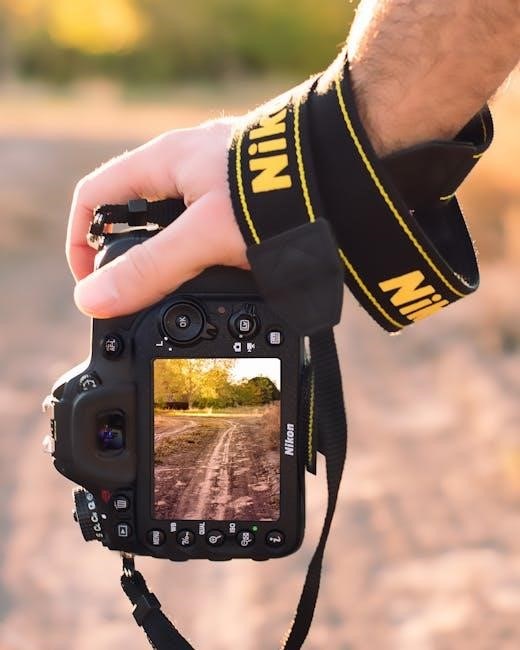
Image Quality and Settings
Explore settings for image size, quality (RAW or JPEG), and white balance to achieve accurate colors and customize your Nikon D5000’s output.
Image Size and Quality Settings (RAW vs. JPEG)
The Nikon D5000 allows you to select various image sizes and quality levels, impacting file size and detail. Larger sizes, like Large, capture more information, ideal for prints and cropping. Quality settings determine compression; Basic produces smaller files with some data loss, while Fine offers higher quality with larger files.
Crucially, choose between RAW and JPEG. JPEG is a processed, compressed format ready for immediate use, but offers limited editing flexibility. RAW files contain unprocessed data from the sensor, providing maximum editing control for adjustments to exposure, white balance, and more. RAW files are significantly larger than JPEGs and require post-processing software.
Consider your workflow: JPEG for quick sharing, RAW for serious editing and archiving. Experiment to find the balance between file size and image quality that suits your needs.
White Balance: Achieving Accurate Colors
White balance (WB) ensures colors are rendered accurately, neutralizing color casts caused by different light sources. The Nikon D5000 offers several WB presets, including Auto, Incandescent, Fluorescent, Direct Sunlight, Cloudy, and Shade. Auto WB generally performs well, but can sometimes be inaccurate.
For precise control, use the Custom WB function. This involves photographing a white or gray card under the current lighting conditions, allowing the camera to establish a neutral baseline. Presets are useful starting points, but custom WB delivers the most accurate results.
Experiment with different settings to achieve the desired look. Incorrect WB can result in images appearing too warm (yellowish) or too cool (bluish). Post-processing software can also adjust WB, but setting it correctly in-camera is ideal.
Picture Control: Customizing Image Appearance
Nikon’s Picture Control system allows you to tailor the look of your images directly within the camera. The D5000 offers Standard, Vivid, Neutral, Portrait, and Landscape presets, each affecting color, contrast, and sharpness. Standard provides a balanced look, while Vivid boosts saturation for vibrant colors.
Neutral is ideal for post-processing, offering a flat profile. Portrait softens skin tones, and Landscape enhances blues and greens. You can further customize these presets or create your own user-defined settings.
Adjusting sharpness, contrast, brightness, saturation, and hue allows for fine-tuning. Experiment to find settings that match your personal style or the specific shooting situation. Picture Control is a powerful tool for achieving desired results in-camera.
Advanced Features and Functions
Explore the D5000’s capabilities, including Live View, built-in flash options, computer connectivity for image transfer, and customizable function button settings.
Live View Shooting: Composing on the LCD Screen
The Nikon D5000’s Live View mode allows you to compose your shots using the camera’s LCD screen, offering a different perspective than the optical viewfinder. To activate Live View, simply press the Live View button located near the shutter release. This is particularly useful for precise composition, macro photography, or shooting from awkward angles where using the viewfinder is difficult.
While in Live View, you can utilize autofocus by pressing the shutter button halfway down. Several autofocus modes are available, including Face-Priority AF, which automatically detects and focuses on faces within the frame. Remember that prolonged Live View usage can lead to sensor heating, potentially affecting image quality, so the camera may automatically shut it off after a certain period. You can adjust Live View settings in the camera menu.
Using the Built-in Flash
The Nikon D5000 features a built-in flash, useful for illuminating subjects in low-light conditions or adding fill-light to balance harsh shadows. To activate the flash, press the flash button on the side of the camera’s hot shoe until the flash icon appears in the viewfinder or on the LCD screen. Several flash modes are available, including Auto, Auto with Red-Eye Reduction, Fill-Flash, Slow Sync, and Manual.
Experiment with different modes to achieve the desired effect. Fill-Flash adds a subtle amount of light, while Slow Sync combines the flash with a slower shutter speed, useful for capturing both the subject and the background in low light. Be mindful of the flash’s range and potential for red-eye. You can also adjust flash compensation in the camera menu to fine-tune the flash output.
Connecting to a Computer: Transferring Images
Transferring images from your Nikon D5000 to a computer is straightforward. First, ensure you have the necessary Nikon software installed, such as Nikon Transfer or ViewNX. Alternatively, the camera will appear as a removable drive when connected via USB cable. Power off the camera, then connect it to your computer using the USB cable. Power the camera back on.
The computer should recognize the camera, and you can then copy the images from the camera’s memory card to your computer’s hard drive. Nikon Transfer facilitates image selection and organization during the transfer process. Always safely eject the camera from your computer before disconnecting the USB cable to prevent data corruption. Regular backups are crucial for safeguarding your precious photos.
Understanding the Function Button
The Function (Fn) button on the Nikon D5000 provides quick access to frequently used settings. By default, pressing the Fn button displays a menu on the LCD screen allowing you to adjust settings like image quality, white balance, ISO sensitivity, and autofocus mode. You can customize which settings appear on this menu through the camera’s setup options.
Customization offers a streamlined workflow, letting you change essential parameters without navigating through the main menu. To customize, access the “Custom Setting” menu and select “Fn Button.” This allows you to assign specific functions to the button, tailoring the camera to your shooting style. Mastering the Function button significantly enhances shooting efficiency.
Customizing Camera Settings for Your Needs
The Nikon D5000 offers extensive customization options to personalize your shooting experience. Explore the “Custom Setting” menu to adjust controls, display settings, and button assignments; You can tailor autofocus behavior, metering preferences, and even the information displayed in the viewfinder or on the LCD screen.
Personalization extends to creating User Defined Settings (U1, U2, U3), allowing you to save and recall specific camera configurations for different shooting scenarios. This is incredibly useful for quickly switching between landscape, portrait, or action settings. Experiment with these options to optimize the D5000 for your individual photographic style and frequently encountered shooting conditions.
Troubleshooting Common Issues
This section addresses frequent problems, including error messages, battery concerns, and lens compatibility, providing clear solutions for a smooth shooting experience.
Error Messages and Solutions
Encountering an error message on your Nikon D5000 can be frustrating, but often easily resolved. Common errors include “Card full” (replace or clear the memory card), “Card locked” (unlock the card via the switch), and “Lens not attached” (ensure proper mounting).
If you see “Error: File cannot be written,” check card space and write-protection. “Function not available” usually indicates an incompatible setting combination – review your current selections. For more complex errors, consult the camera’s manual’s dedicated troubleshooting section.
Resetting the camera to factory defaults (via the setup menu) can sometimes clear persistent errors. If problems persist, note the exact error code and search Nikon’s support website for specific guidance. Remember to always handle the camera and accessories with care to avoid physical damage contributing to errors.
Battery Life and Management
Maximizing battery life on your Nikon D5000 is crucial for extended shooting sessions. The EN-EL9 battery provides approximately 510 shots per charge (CIPA standard), but this varies with usage. Live View, frequent flash use, and prolonged menu navigation significantly reduce battery duration.
To conserve power, disable Live View when not needed, reduce LCD brightness, and utilize the optical viewfinder. Always charge the battery fully before use, and avoid extreme temperatures. Store spare batteries in a cool, dry place.
Avoid fully discharging the battery frequently, as this can shorten its lifespan. Use the included charger (MH-E29a) and avoid third-party alternatives. Regularly check the battery indicator in the camera’s display to monitor remaining power and plan accordingly for replacements.
Lens Compatibility and Issues
The Nikon D5000 utilizes the Nikon F mount, offering compatibility with a vast range of Nikkor lenses, both older and newer designs. DX-format lenses are specifically designed for APS-C sensors like the D5000’s, providing optimal image quality. FX-format lenses can also be used, but will result in a 1.5x crop factor.
Potential issues may arise with older lenses lacking built-in autofocus motors. These require the camera’s internal autofocus system, which may be slower or less accurate. Ensure lens contacts are clean for proper communication. If a lens isn’t recognized, try cleaning the contacts or updating the camera’s firmware.
Third-party lenses from manufacturers like Sigma and Tamron are generally compatible, but check for specific compatibility information before purchasing. Always use a lens hood to protect the front element and minimize flare.